안녕하세요~ 두결입니다.
지난시간에는 팝업화면에서 설정한 게임단계값을 메인으로 전달해보았고, 그 단계값에 따라서 게임이미지를 다르게 보여주었습니다. 그리고, Spinner의 특정위치의 항목이 선택되도록 설정하는 방법까지 다루어보았습니다.
이번시간에는 새로운것을 해보겠습니다.
바로 프로그레스바입니다.
▣ 프로그래스바란? 프로그래스바 생성하고 화면에 표시하기
프로그래스바는 무엇인지 설명하지 않아도 다들 아실텐데요~
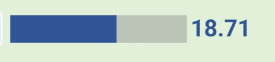
프로그래스바는 위와같이 진행상태를 시각적으로 보여주는 위젯입니다.
지난시간까지 했던 PopupTest2 프로젝트는 닫구요~
이번시간부터는 새프로젝트를 만들어서 진행해보겠습니다.
WidgetTest라는 새프로젝트를 생성해보겠습니다.

레이아웃 화면에서
좌측에 Palette에서 Widgets->ProgressBar(Horizontal)를 선택해서 갖다놓겠습니다.
<ProgressBar
    android:id="@+id/pgbarHBar"
    style="?android:attr/progressBarStyleHorizontal"
    android:layout_width="wrap_content"
    android:layout_height="wrap_content"
    app:layout_constraintBottom_toBottomOf="parent"
    app:layout_constraintEnd_toEndOf="parent"
    app:layout_constraintHorizontal_bias="0.5"
    app:layout_constraintStart_toStartOf="parent"
    app:layout_constraintTop_toTopOf="parent"
    app:layout_constraintVertical_bias="0.5" />
ID는 pgbarHBar라고 하겠습니다.
실행을 해보면

위와같이 프로그래스바가 잘보이네요~ ^^
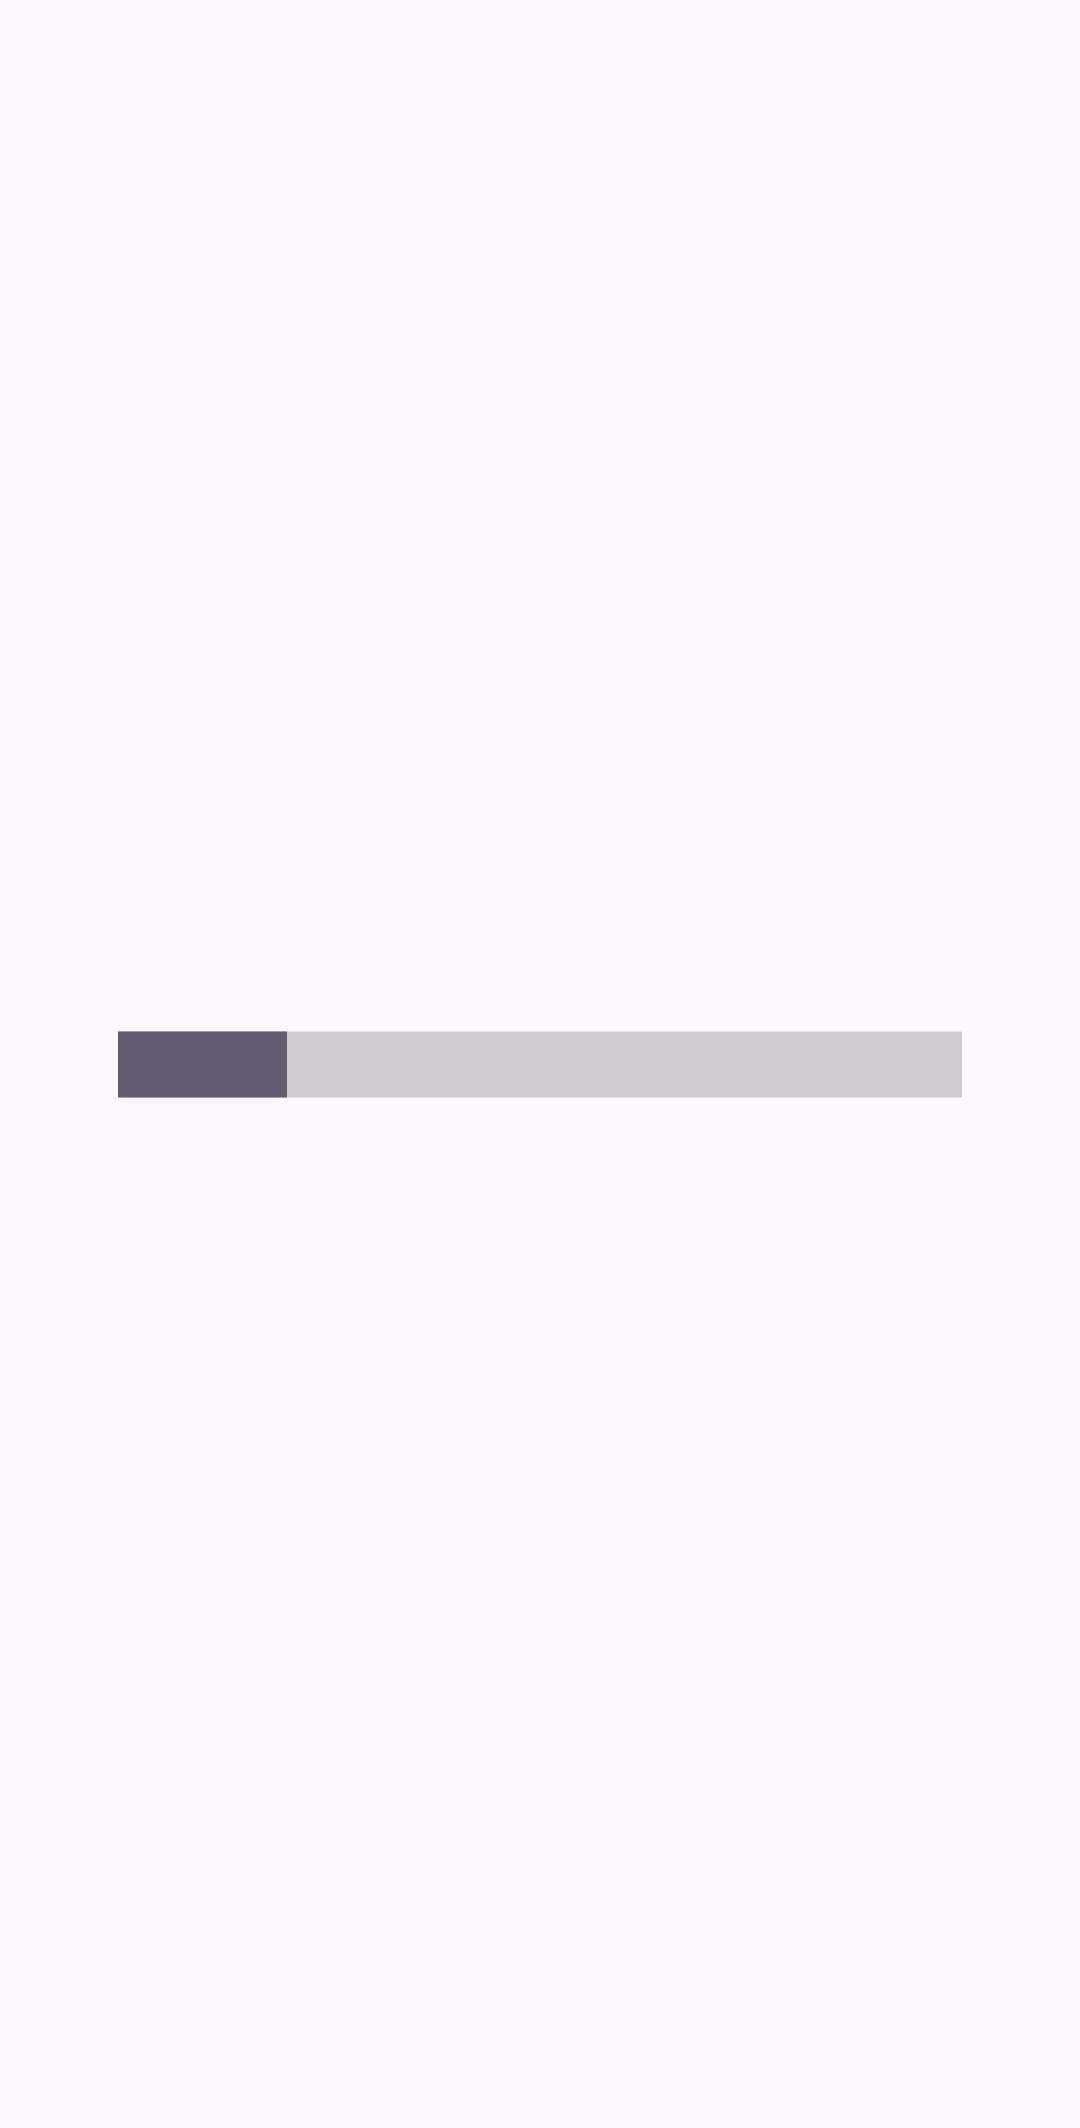
▣ 프로그래스바 넓이, 높이 설정하기
근데, 프로그래스바가 너무 작네요.. 크기를 좀 키워보겠습니다.
<ProgressBar
    android:id="@+id/pgbarHBar"
    style="?android:attr/progressBarStyleHorizontal"
    android:layout_width="300dp"
    android:layout_height="wrap_content"
    app:layout_constraintBottom_toBottomOf="parent"
    app:layout_constraintEnd_toEndOf="parent"
    app:layout_constraintHorizontal_bias="0.5"
    app:layout_constraintStart_toStartOf="parent"
    app:layout_constraintTop_toTopOf="parent"
    app:layout_constraintVertical_bias="0.5" />
가로의 길이는 XML에서 layout_width로 바꿀수있습니다. 여기에서는 300dp라고 설정하였습니다.

네.. 가로 길이가 잘 길어졌네요~
세로두께도 XML layout_height에서 쉽게 바꾸면 좋겠지만.. 세로두께는 적용이 안되네요~
세로 두께는 setScaleY()함수를 사용해야합니다.
setScaleY()함수는 뷰의 세로 크기를 지정된 비율로 확대하거나 축소할때 사용되는 함수입니다.
setScaleY(1)은 기본값
setScaleY(0.5)는 50%로 축소
setScaleY(2)는 2배로 확대 입니다.
ProgressBar pgBar_HBar = findViewById(R.id.pgbarHBar);
pgBar_HBar.setScaleY(10);
pgBar_HBar라는 객체를 생성하고 setScaleY(10)을 해주었습니다. 10배로 확대하는거죠?
실행해보겠습니다.

네, 이제야 두꺼운 ProgressBar가 되었네요.. ^^
근데, 이번에는 너무 두꺼운것 같으니 6배정도만 하도록 하겠습니다.
▣ 프로그래스바 최대값, 현재값 설정하기, 진행상태 색상 바꾸기
다음으로
ProgressBar의 최대값과 현재값을 해보겠습니다.
ProgressBar pgBar_HBar = findViewById(R.id.pgbarHBar);
pgBar_HBar.setScaleY(6);
pgBar_HBar.setMax(100);
pgBar_HBar.setProgress(20);
위와같이 최대값은 setMax()로
현재설정값은 setProgress()로 할수 있습니다.
최대 값은 100, 현재값은 20으로 설정하였습니다.
실행을 해보면
네 위와같이 최대값 100중에 20만큼 프로그래스바 진행도가 표시되네요..^^
이제, 프로그래스바 색상도 한번 바꿔보겠습니다.
ProgressBar pgBar_HBar = findViewById(R.id.pgbarHBar);
pgBar_HBar.setScaleY(6);
pgBar_HBar.setMax(100);
pgBar_HBar.setProgress(20);
pgBar_HBar.setProgressTintList(ColorStateList.valueOf(Color.parseColor("#CD4567")));
보통은 setBackgroundColor()함수로 하는데
프로그래스바는 setBackgroundColor()를 사용하면 뒷배경색이 바뀌어버립니다.
프로그래스바의 진행상태 색상을 바꾸려면
위와같이 setProgressTintList()함수로 해야합니다.
setProgressTintList()는 프로그래스바의 진행상태 색상을 ColorStateList객체로 설정할때 사용하는 함수입니다.
실행을 해보면
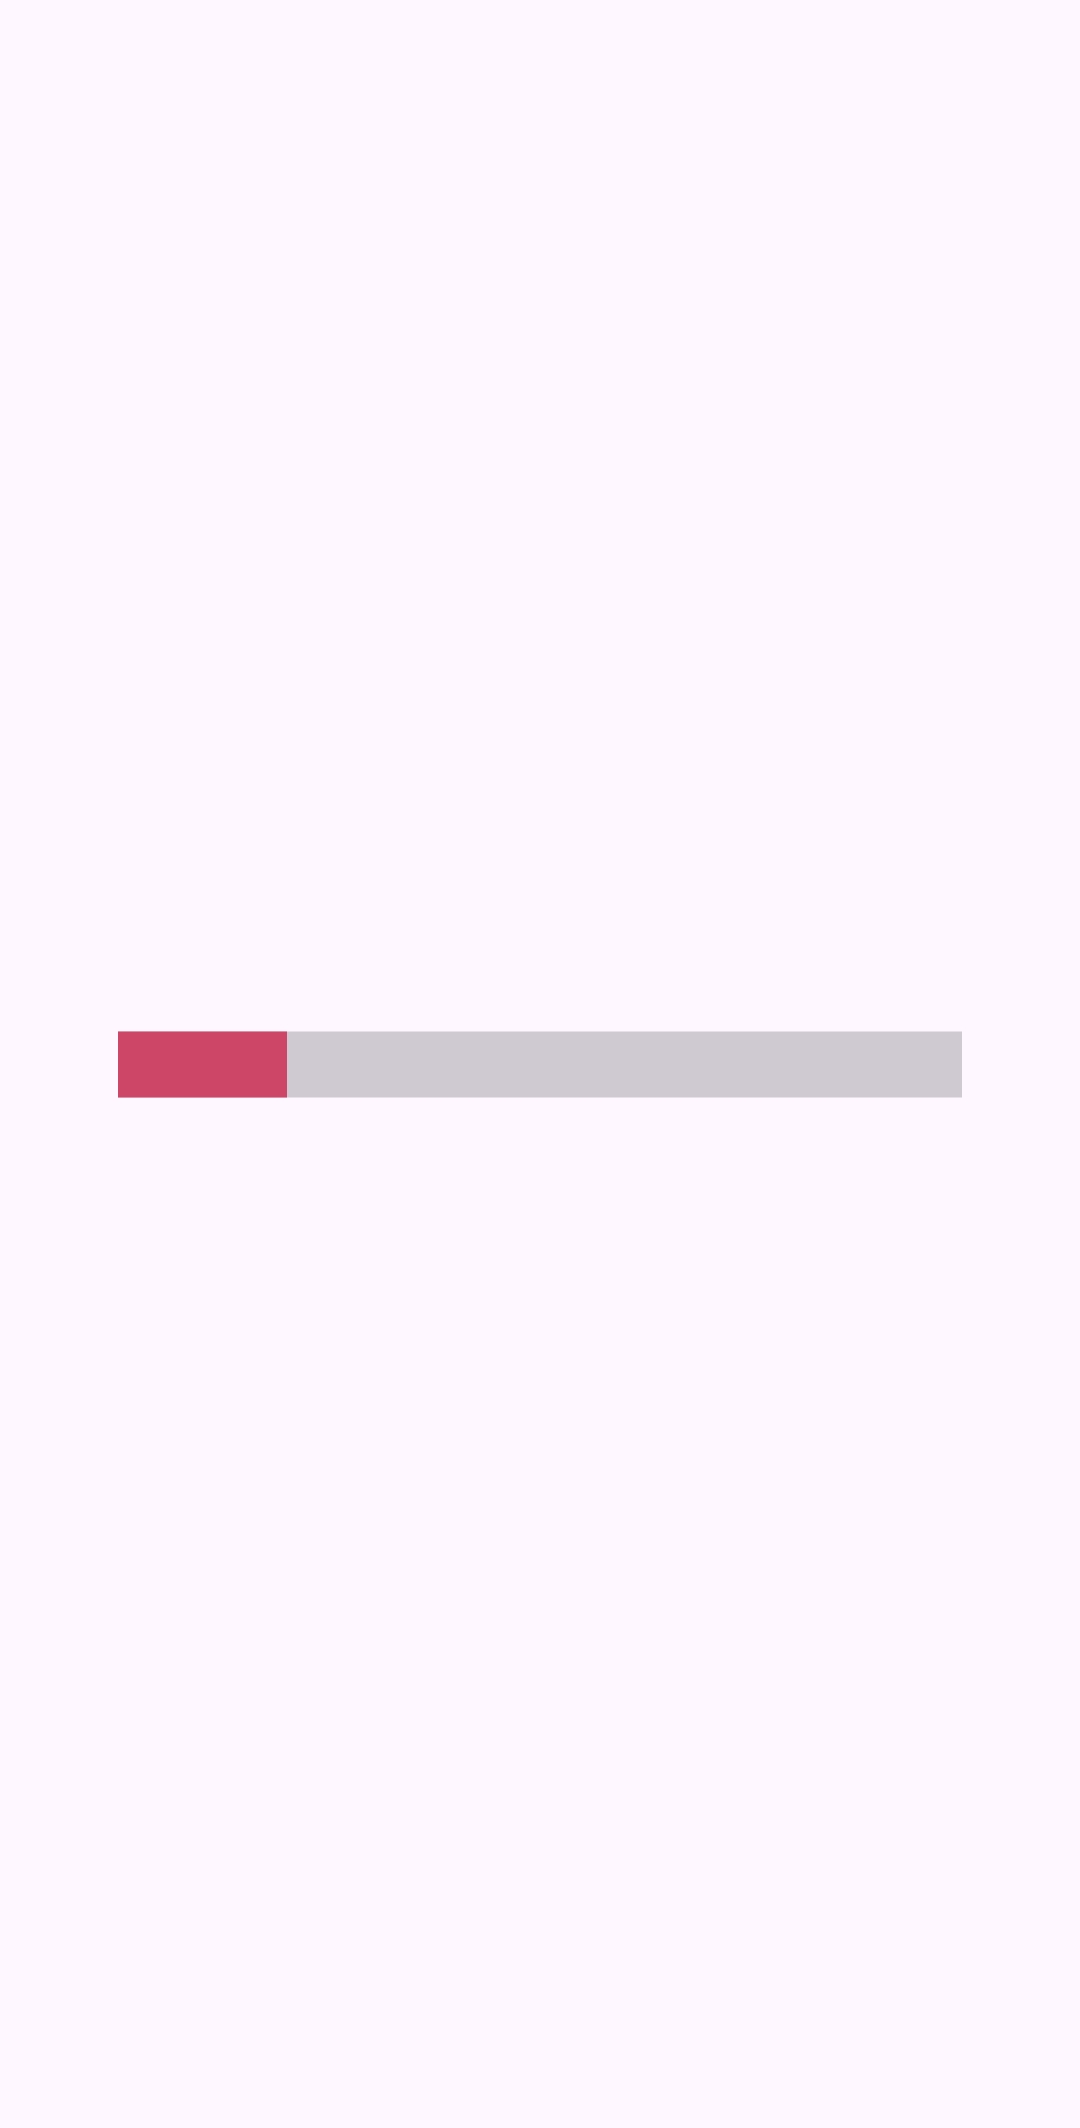
네 위와같이 색상이 잘 바뀌었네요..^^
약간 짧은감이 있으니 한가지만 더해보겠습니다.
▣ 라디오버튼이란? 라디오버튼과 라디오그룹 화면에 표시하기
원래는 타이머를 이용해서 프로그래스바 진행도가 점점 올라가는것을 해볼려고했는데..
블로그 이웃님중에 "동동_Edward"님께서 체크박스 애기를 해주셔서
체크박스와 라디오버튼도 한번 다루어 보도록 하겠습니다.
먼저, 라디오버튼부터 해보겠습니다.
라디오버튼은 잘아시겠지만 여러 옵션 중에서 하나만 선택할 수 있는 사용자 인터페이스(UI) 요소입니다.
보통 라디오버튼은 여러개중에 한개만 선택할수 있기때문에 라디오그룹과 같이 쓰입니다.
라디오그룹이 없으면 라디오버튼이라고 해도 동시에 여러개를 선택할수 있습니다.
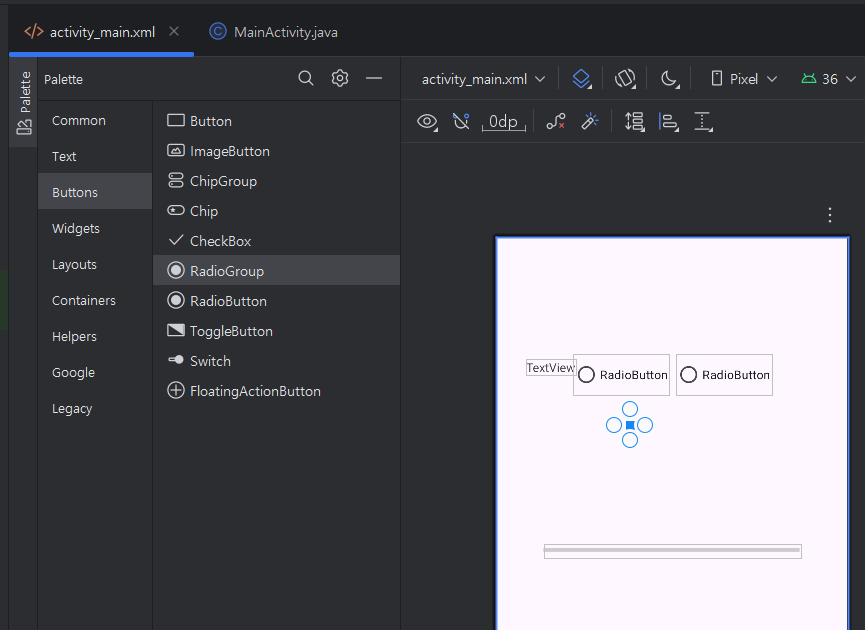
위와같이 TextView 1개, RadioButton 2개, RadioGroup 1개를 화면에 갖다놓겠습니다.
좌측 Palette에 Buttons에 들어가보면 RadioGroup, RadioButton, CheckBox가 있습니다.
<TextView
    android:id="@+id/textView"
    android:layout_width="wrap_content"
    android:layout_height="wrap_content"
    android:text="항목 1 : 안드로이드 앱개발을 해본 경험이 있습니까?"
    app:layout_constraintBottom_toBottomOf="parent"
    app:layout_constraintEnd_toEndOf="parent"
    app:layout_constraintHorizontal_bias="0.1"
    app:layout_constraintStart_toStartOf="parent"
    app:layout_constraintTop_toTopOf="parent"
    app:layout_constraintVertical_bias="0.1" />


<RadioGroup
    android:id="@+id/radioGroup"
    android:layout_width="wrap_content"
    android:layout_height="wrap_content"
    android:orientation="horizontal"
    app:layout_constraintBottom_toBottomOf="parent"
    app:layout_constraintEnd_toEndOf="parent"
    app:layout_constraintHorizontal_bias="0.3"
    app:layout_constraintStart_toStartOf="parent"
    app:layout_constraintTop_toTopOf="parent"
    app:layout_constraintVertical_bias="0.15"
    tools:ignore="MissingConstraints">
    <RadioButton
        android:id="@+id/rbtnYes"
        android:layout_width="wrap_content"
        android:layout_height="wrap_content"
        android:text="예"
        android:layout_marginEnd="50dp"/>

    <RadioButton
        android:id="@+id/rbtnNo"
        android:layout_width="wrap_content"
        android:layout_height="wrap_content"
        android:text="아니오" />
</RadioGroup>
XML 코드입니다.
먼저, TextView는 어떤 값을 바꾸는게 아니라 문자만 표시하는거라서 id가 필요가 없으니까 id는 그대로 두고
text만 "항목 1 : 안드로이드 앱개발을 해본 경험이 있습니까?"로 바꾸었습니다.
그리고, RadioButton은 2개인데 둘중에 하나만 선택해야되기때문에
RadioGroup 안쪽으로 2개를 넣었습니다.
이렇게 RadioGroup안에 넣어줘서 그룹으로 묶어야 2개중에 하나만 선택할 수 있습니다.
RadioGroup의 ID는 radioGroup으로 그대로 두었고
RadioButton의 ID는 rbtnYes, rbtnNo라고 하였습니다.
text는 "예", "아니오"로 하구요~
RadioGroup내에 Radio Button은 위치는 RadioGroup에 따라가기때문에 별도로 지정하지 않았습니다.
대신, Radio Button간의 간격을 띄워야 하기때문에
android:layout_marginEnd = "50dp"로 설정하였습니다.
layout_marginEnd는 뷰의 끝(End)부분에 여백을 지정하는 속성입니다.
이렇게 하면 2개의 Radio Button간의 간격을 띄울수 있습니다.
자, 잘되는지 실행해볼까요?
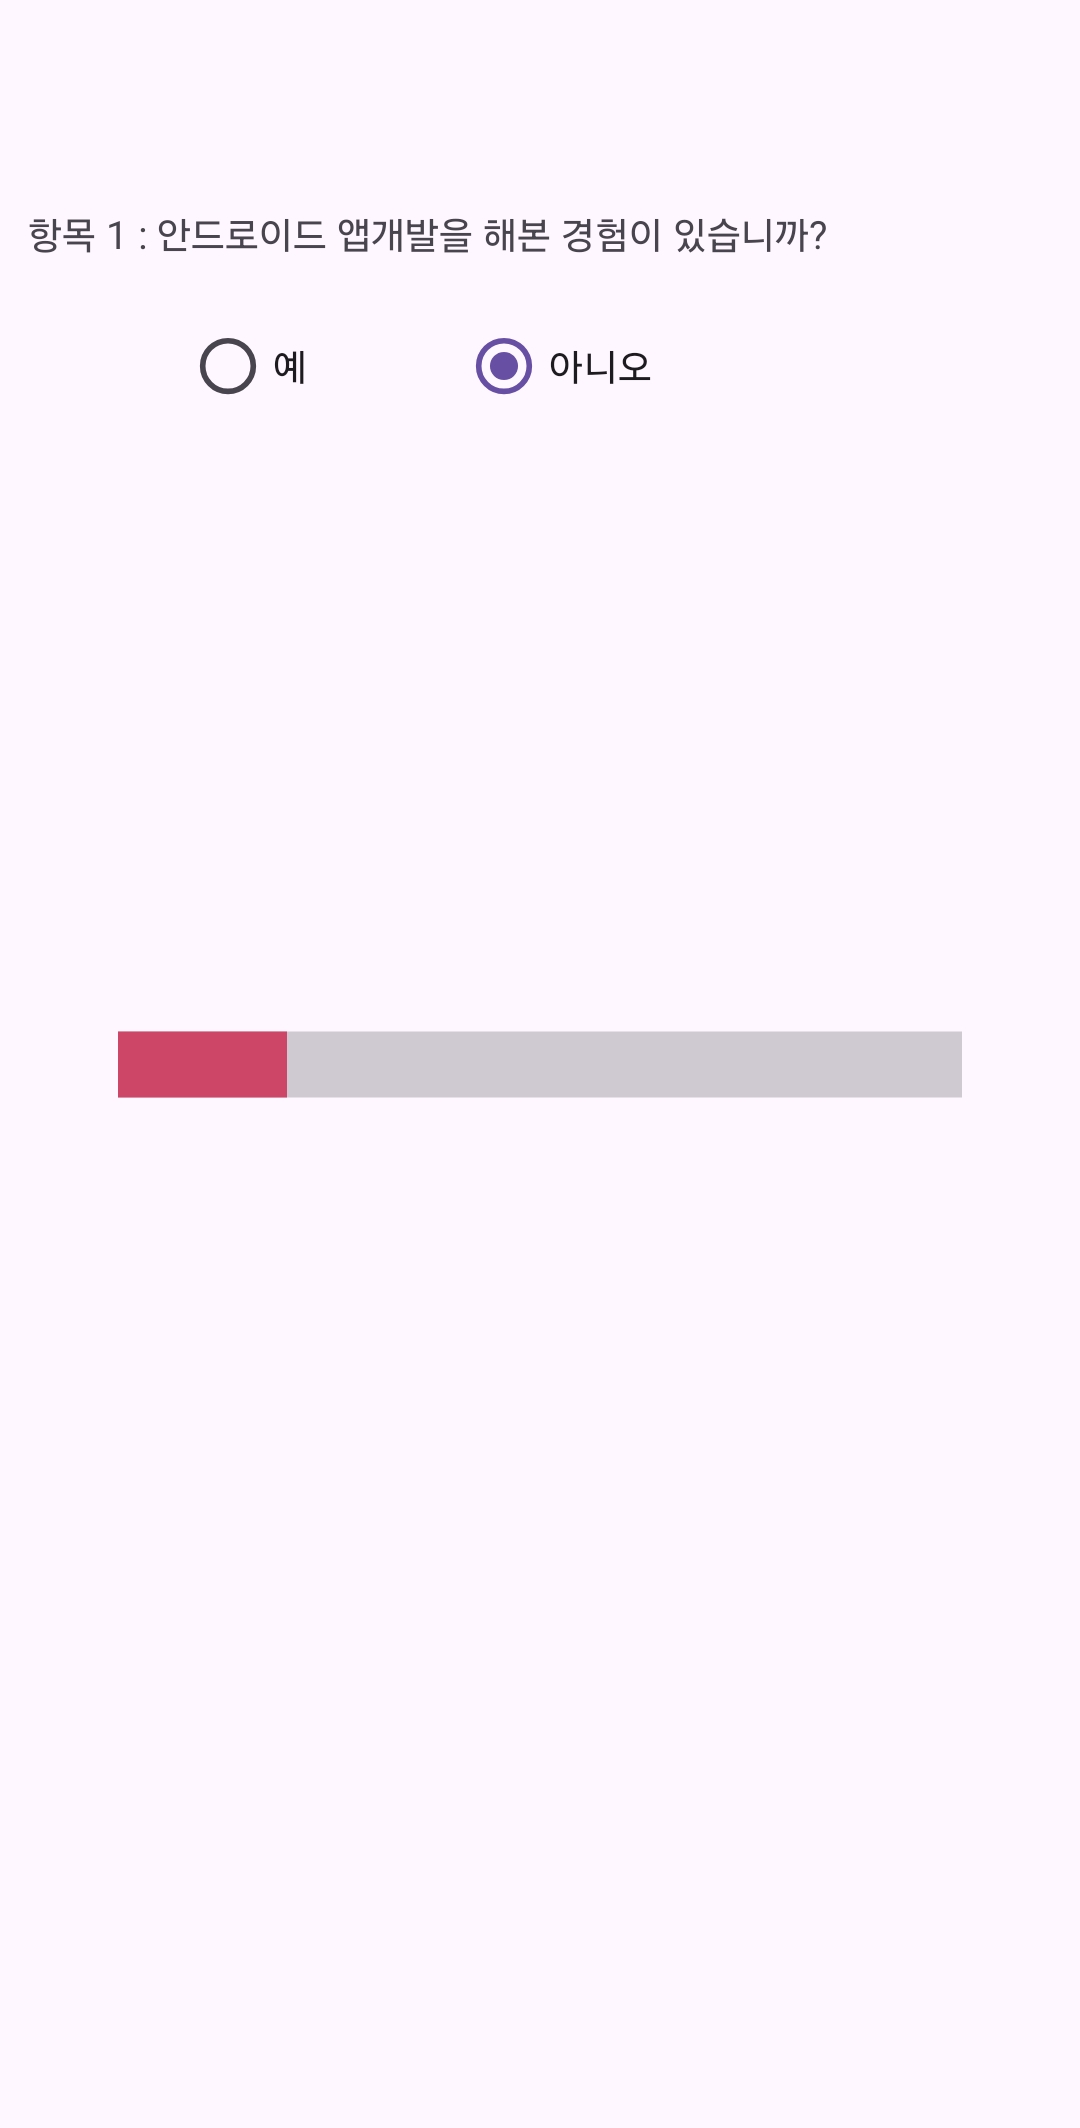
네, 위와같이 라디오 버튼이 잘 보이네요.. ^^
▣ 라디오버튼의 선택값 가져오기
자, 이제 라디오그룹의 Check이벤트를 통해 선택된 값을 가져오는 것을 해보겠습니다.
RadioGroup radioGroup = findViewById(R.id.radioGroup);
radioGroup.setOnCheckedChangeListener(new RadioGroup.OnCheckedChangeListener() {
    @Override
    public void onCheckedChanged(@NonNull RadioGroup radioGroup, int i) {

    }
});
위와같이 radioGroup객체를 생성하였구요
버튼 클릭이벤트처럼 setOnCheckedChangeListener를 등록하였습니다.
setOnCheckedChangeListener는 체크박스, 라디오버튼 등의 위젯에서 체크 상태가 변경될때 발생하는 이벤트를 처리할때 사용하는 리스너입니다.
그리고, onCheckedchanged()함수에서 체크상태가 변경되었을때의 할일을 코드로 작성해주시면 됩니다.
자, 이제 코드를 작성해보겠습니다.
String sSelectRadioButtonText="";RadioGroup radioGroup = findViewById(R.id.radioGroup);
radioGroup.setOnCheckedChangeListener(new RadioGroup.OnCheckedChangeListener() {
@Override
public void onCheckedChanged(@NonNull RadioGroup radioGroup, int i) {
RadioButton radioButton = findViewById(i);
sSelectRadioButtonText = radioButton.getText().toString();
Toast.makeText(getApplicationContext(),sSelectRadioButtonText, Toast.LENGTH_SHORT).show();
}
});
위와같이 라디오버튼의 체크상태가 변했을때
onCheckedChanged()함수의 두번째 인자인 i값을 통해서
현재 체크상태가 변한 라디오버튼를 생성한 뒤에
getText()로 현재 값을 받아와서 String형 변수인 sSelectRadioButtonText에 저장을 하였습니다.
그리고, Toast 메세지로 띄워보았습니다.
잘되는지 한번 실행해보겠습니다.
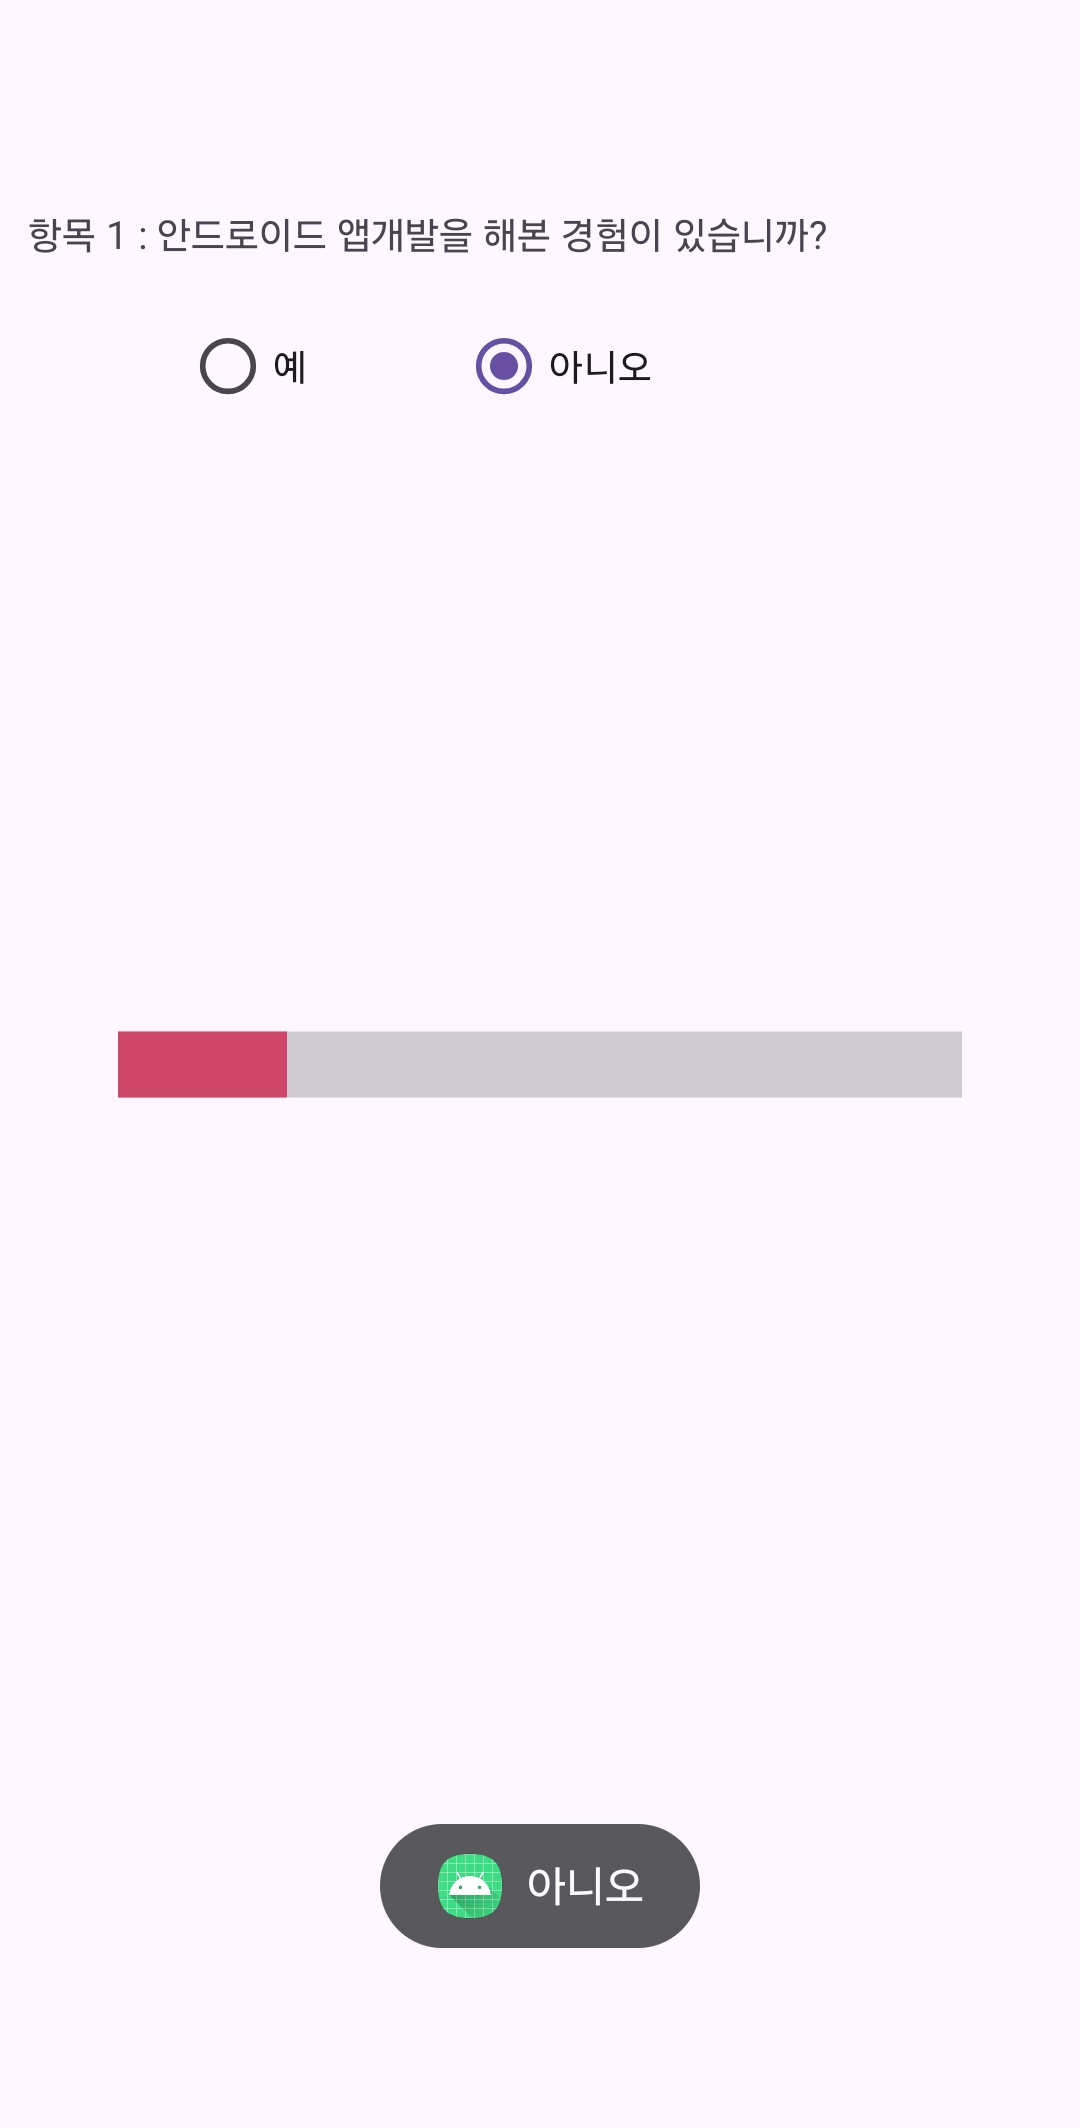
네, 위와같이 아니오를 선택했을때
아래쪽에 "아니오" 메세지가 잘 보여지네요..^^
너무 길어져서 체크박스는 다음시간에 해봐야겠네요~
이번시간은 여기까지만 하도록 하구요~
다음시간에는 체크박스를 사용해보고, 라디오 버튼과 체크박스를 사용해서 프로그래스바의 진행율을 올리는 것까지
해보도록 하겠습니다.
그럼, 이만!
감사합니다. ^^